Beyond the Basics: Why Your Chocolate-Covered Strawberries Deserve an Upgrade
Often perceived as a simple confection, the humble chocolate-covered strawberry holds a surprising depth for those willing to go the extra mile. While anyone can melt chocolate and dip a berry, achieving that truly professional, glossy finish and satisfying hard-shell snap requires a nuanced approach. This isn't just about a quick dip; it's about crafting an experience – a luxurious treat that delights the senses and impresses even the most discerning palate. If you’ve ever wondered why your homemade versions lack that bakery-quality sheen or tend to melt too quickly, you're in the right place. We're diving deep into the techniques that transform ordinary fruit into extraordinary classic chocolate covered strawberries, perfect for gifting, entertaining, or simply indulging your sweet tooth.
The journey to perfecting these delectable treats starts with understanding the subtle science behind the ingredients and processes. From selecting the right chocolate to mastering the delicate art of tempering, every step plays a pivotal role in the final outcome. Forget the notion that a recipe for chocolate-covered strawberries is unnecessary – the "masters" know that attention to detail makes all the difference, especially when you're aiming for that flawless, hard-shell finish and an irresistible shine.
The Essential Ingredients: Quality Matters
While the ingredient list for classic chocolate covered strawberries might seem straightforward, quality is paramount. Here's what you'll need and why your choices matter:
- 1 pound of Strawberries: Opt for fresh, ripe, firm strawberries with vibrant green stems. Avoid any bruised or overly soft berries. Size matters too; medium-to-large berries are easier to handle and offer a better chocolate-to-fruit ratio.
- 12 oz Baker's Chocolate (or High-Quality Chocolate Chips/Bars): The choice of chocolate significantly impacts both the working ease and the final appearance. While any good quality chocolate will work, many connoisseurs prefer Baker's chocolate for its consistent melt and beautiful finish. If using chocolate chips, look for brands designed for melting or baking, as standard snacking chips often contain stabilizers that can affect the texture and shine. For a truly decadent experience, consider high-quality couverture chocolate with a cocoa butter content of 32-39%, which is formulated for superior melting and gloss. Dark chocolate provides a wonderful contrast to the sweetness of the berries, but milk or white chocolate can also be used, keeping in mind they melt at different temperatures.
- 1 cup White Vinegar & 3 cups Water: This seemingly unconventional wash is a game-changer for berry longevity and cleanliness.
Prepping Your Canvas: The Essential Strawberry Foundation
The quality of your strawberries and how you prepare them are foundational to the success of your chocolate-covered creations. Skipping these crucial steps often leads to watery chocolate, a lack of adhesion, or prematurely spoiled berries. Think of your strawberries as the canvas – you want them pristine and perfectly prepared before you apply the "paint."
Step 1: The Vinegar Wash – Beyond a Simple Rinse
Many home cooks might simply give their strawberries a quick rinse under running water, believing it's sufficient. However, for truly spectacular and long-lasting classic chocolate covered strawberries, a vinegar bath is highly recommended. This simple step serves a dual purpose:
- Mold Spore Elimination: Strawberries are notoriously delicate and susceptible to mold. A vinegar solution effectively kills mold spores present on the surface of the fruit, significantly extending their freshness. This means your beautiful creations will last longer, a huge benefit if you're preparing them in advance or for a special occasion.
- Thorough Cleaning: Beyond mold, the wash helps remove dirt, pesticides, and any lingering debris.
Method:
In a large bowl, combine 1 cup of white vinegar with 3 cups of water. Gently submerge your strawberries, ensuring they are fully immersed. Let them soak for approximately 5 minutes. After soaking, rinse the strawberries thoroughly under cold running water. This step is critical to ensure no lingering vinegar taste, so don't be shy with the rinse. You can even taste-test a few berries to be absolutely sure they are free of any vinegary tang.
Step 2: The Crucial Art of Drying
This is perhaps the single most overlooked, yet most critical, step for achieving a perfect chocolate shell. Water is the enemy of chocolate. Even the smallest droplet can cause your beautiful, glossy chocolate to seize (turn thick, grainy, and unusable) or prevent it from adhering properly to the strawberry. It can also lead to a dull, streaky finish.
Method:
After rinsing, spread your strawberries out in a single layer, stem-side down, on a clean, lint-free kitchen towel. Allow them to air dry for 10 to 15 minutes. This initial air-drying allows excess moisture to evaporate. Follow this by gently patting each strawberry completely dry with a fresh paper towel. Pay particular attention to the area around the stem and any crevices. The goal is bone-dry berries – if you think they're dry, dry them for another minute!
For more detailed insights on perfecting your chocolate-covered treats, you might find valuable tips in The Secret to Perfect Chocolate Covered Strawberries: Expert Tips.
The Art of the Melt: Tempering for That Irresistible Gloss and Snap
This is where the magic truly happens, transforming simple melted chocolate into a perfectly structured coating. Tempering chocolate is the secret to achieving that coveted hard, glossy shell that doesn't melt in your hands, cracks beautifully when bitten, and resists bloom (the grayish streaks that can appear on untempered chocolate). While it sounds intimidating, it's an achievable technique with a little practice.
Step 3: Preparing Your Workspace and Chocolate
Before you even think about melting, prepare your landing zone. Line a baking sheet with wax paper or parchment paper. This will prevent the chocolate from sticking as it sets, ensuring you can easily remove your finished berries without cracking their delicate shells.
Next, prepare your chocolate. Chop your chosen chocolate into small, uniform pieces. This helps it melt evenly. Set aside about one-quarter of your chocolate – this "seed" chocolate is crucial for the tempering process.
Step 4: Mastering the Melt and Tempering Process
The double-boiler method (bain-marie) is ideal for melting chocolate gently and evenly, preventing it from burning. Direct heat is chocolate's foe.
Method:
- Set up your Double Boiler: Fill a saucepan with about an inch or two of water. Bring the water to a simmer over medium heat.
- Initial Melt: Place a heat-proof bowl (glass or stainless steel) over the saucepan, ensuring the bottom of the bowl does not touch the simmering water. Add about three-fourths of your chopped chocolate to the bowl. Reduce the heat to low.
- Gentle Stirring: Stir the chocolate constantly with a rubber spatula as it melts. Chocolate can burn quickly, even over indirect heat. Continue stirring until the chocolate is mostly melted, smooth, and shiny, but still contains a few small lumps. The goal is to reach a temperature between 110-115°F (43-46°C) for dark chocolate, and slightly lower for milk or white chocolate.
- Remove from Heat and "Seed": Immediately remove the bowl from the saucepan. Add the reserved one-quarter of unmelted chocolate to the bowl.
- Stir to Temper: Continue stirring vigorously. The unmelted chocolate pieces, known as "seed" chocolate, will slowly melt into the warm chocolate. This process introduces stable chocolate crystals, guiding the rest of the chocolate into a tempered state. Keep stirring until all the chocolate is fully melted, smooth, and perfectly uniform. At this point, the chocolate should cool down to its working temperature: 88-91°F (31-33°C) for dark chocolate, and 86-88°F (30-31°C) for milk/white chocolate. A clean, instant-read thermometer is your best friend here.
The result of proper tempering is a chocolate that not only boasts a beautiful, reflective sheen but also sets with a firm, satisfying snap. This technique is what elevates your homemade classic chocolate covered strawberries to professional-grade.
Dipping with Precision and Perfecting the Set
With your perfectly prepped strawberries and beautifully tempered chocolate, you're ready for the grand finale.
Step 5: The Dipping Dance
Hold a dry strawberry by its stem (or the leaves). Dip it into the tempered chocolate, rotating it to coat evenly. You can dip it fully or leave a little bit of the red peeking out at the top for a classic look. Gently lift the strawberry out of the chocolate and let any excess drip off. You can lightly tap the wrist holding the strawberry against the edge of the bowl to encourage the chocolate to drip, ensuring a thinner, more elegant coating. Avoid scraping the strawberry against the bowl's rim, as this can leave unattractive lines.
Step 6: Setting for Perfection
Carefully place each dipped strawberry, chocolate-side down, onto your prepared wax paper-lined baking sheet. Allow the strawberries to set at room temperature. This is crucial for properly tempered chocolate to form its hard, glossy shell. Placing them directly into the refrigerator immediately can cause condensation and dull the shine. They are finished when the chocolate shell feels firm and doesn't feel tacky to the touch – this usually takes about 15-30 minutes, depending on the room temperature and thickness of the chocolate.
Once fully set, you can transfer them to an airtight container and refrigerate them. For optimal freshness and flavor, especially if you're serving them to a loved one or guests, it's recommended to enjoy them within 24-48 hours. The contrast of the juicy strawberry and the crisp chocolate shell is truly magical.
Elevating Your Chocolate-Covered Creations: Troubleshooting & Presentation Tips
Even with the best techniques, sometimes things don't go exactly as planned. Here are some common issues and ways to elevate your presentation:
Common Troubleshooting
- Dull or Streaky Chocolate: This is almost always a sign of improperly tempered chocolate or moisture. Re-temper your chocolate if necessary, and ensure your strawberries are completely dry.
- Chocolate Seizing: If your chocolate becomes thick, grainy, and unworkable, it means water (even a tiny drop!) has come into contact with it. Unfortunately, seized chocolate is difficult to recover for dipping.
- Chocolate Peeling Off: Again, moisture is usually the culprit. Make sure your strawberries are bone-dry.
- Chocolate Too Thick: If your tempered chocolate is too thick, it might have cooled too much. Gently warm it over the double boiler for a few seconds, stirring constantly, to bring it back to its ideal working temperature.
Presentation and Beyond
Once your classic chocolate covered strawberries are perfectly set, you can take them to the next level:
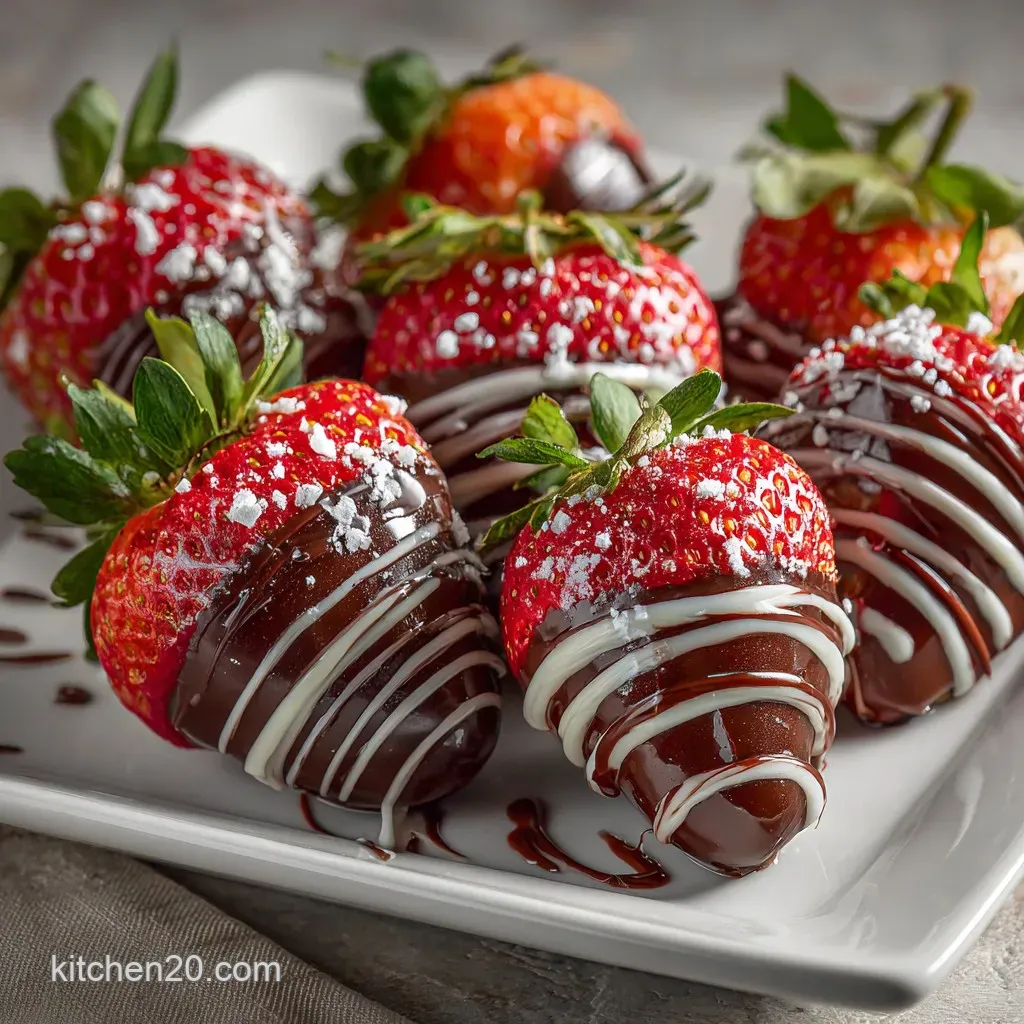
- Drizzles: Drizzle contrasting melted chocolate (white chocolate on dark, dark on white) for an elegant flourish. Use a piping bag with a tiny snipped tip or a fork for delicate lines.
- Toppings: Before the chocolate fully sets, sprinkle with finely chopped nuts, shredded coconut, mini chocolate chips, or edible glitter.
- Display: Arrange them artfully on a platter, perhaps nestled in paper liners, or individually wrapped for gifting. They make an incredibly elegant yet simple treat, as detailed in Create Irresistibly Easy & Elegant Chocolate Covered Strawberries.
- Storage: Store them in a single layer in an airtight container in the refrigerator. Bring them to room temperature for about 10-15 minutes before serving for the best flavor and texture.
Creating glossy, hard-shell chocolate-covered strawberries is a rewarding culinary endeavor that showcases both precision and artistry. By focusing on quality ingredients, meticulous preparation, and the indispensable technique of tempering, you can consistently produce treats that not only look stunning but also deliver an unforgettable taste and texture experience. So, go forth and transform those humble berries into masterpieces!
